Overview
- This page contains clickable links (blue texts) to find more detailed information, you can also use the above contents menu for easy navigation.
- Starting a game should be self explanatory
- If you have any problems or questions you can find help by searching and/or posting on the steam forums as a lot of the community (including developers) will assist you.
Tutorial / Controls
- This section is a basic tutorial, the controls given on this page are default keys.
- The in-game main menu has an options menu allowing you to see the following controls, with the possibility to rebind keys.
Character Controls
- W, A, S, D - moves your character side to side, up and down (including ladders). "S" can revive other players.
- E - interacts with various things inside the Submarines and Caves.
- Q - provides an exterior view using a Periscope.
- Left click - swing/shoot your personal items, weapons, and tools. Can be held down when holding melee weapons or the Tesla Gun to charge an attack.
- H - Displays a help icon (!). Activated by default upon death. Hold "S" on a dead player to revive.
Other Controls
- Enter - Open Chat
- Tab - Close Chat & View players
- Escape - Options
- Spacebar - Dodge Roll (Enables Tactical View if pressed while using the Periscope)
- V -Turns on voice chat
Submarine - ("Roles")
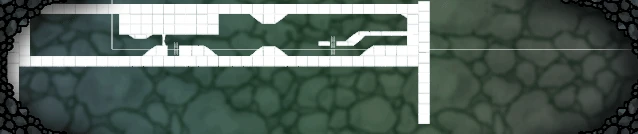
The submarine layouts can be seen after clicking one of the current submarines, each highlighted area will be referred to in the following sub-categories.
Engine Room - ("Engineer")
- The center switch has 3 positions.
- Down - Shuts everything off including the interior lights, nothing else can be powered.
- Middle - Provides power to the interior lights and allows the other consoles to be powered.
- Up - EMP weapon that kills most enemies instantly, but locks into the "down" position temporarily.
Each console has a unique symbol and should be easily recognizable.
| Consoles
(Powered) |
Effect | Max
Power |
Submarine |
|---|---|---|---|
| Exterior
Lights |
Light surrounds the submarine (not controllable).
Light is attached to the submarine weapon (controllable). |
1 | All |
| Shields | Blocks damage, each power level allows for higher charge. | 3 | Crevette, Perle |
| Weapons | 1 Power to activate the turret
2 Power to increase fire rate (Minigun) or increase ammo capacity (Cannon) |
2 | Requin - 2
Others - 1 |
| Engines | Propels the submarine (more power increases speed). | 3 | All |
- E - to occupy and exit a console.
- W, S - to add or remove power to the occupied console.
- Q - to use the periscope
- Spacebar - to activate Tactical view while using the periscope
- E - occupy and exit the console.
- W, S - angle the submarine up or down
- A, D - turns the submarine in the desired direction, left or right.
Weapons Room - ("Gunner")
- E - occupy and exit the console, also used to grab and load torpedoes.
- W, S - Rotates the Turret, allowing the gunner to aim at the enemies.
- A, D - Switches between the Minigun and Cannon
- 1 power for a minigun (unlimited ammo) and 1 torpedo slot (needs to be loaded), 2 power for a minigun and 3 torpedo slots.
- Space bar - is used to shoot both ammo types, provided the above requirements are met.
The Hatch
Exit and enter the submarine once a cave is entered.
- E - Exits when hatch is highlighted.
- E - Enters when the submarine is highlighted.
The Bed
Slowly heals your character.
- E - Enters and exits the bed.
Caves
- A Cave contains various things to aid you in your current and future journeys.
- These are fairly easy to explore, just be careful of Enemies. Don't let your health drop too low if the path back isn't clear.
Strategies
Loadout / Found Items
- Loadout
- Best weapons: Sword, Any gun, or Tesla. If safe dynamite is ON, I recommend dynamite.
- Single player: You have a repair tool. Alternative: You have a weapon, and at least two repair bots.
- Note: You should never go on a shieldless ship alone. You will almost certainly die. I speak from experience.
- Two players on a shielded ship: One should have a repair tool, and one should have a strong weapon.
- Two players on a shieldless ship: Two have repair tools.
- Three players on a shielded ship: One has a repair tool. Two have weapons. Alternative: One has a repair tool. One has a weapon. One has potions.
- Three players on a shieldless ship: Two have repair tools. One has a weapon.
- Four players on a shielded ship: One has a repair tool. Three have weapons. Alternative: One has a repair tool. Two have weapons. One has a healing tool.
- Four players on a shieldless ship: Two have repair tools. Two have weapons. Alternative: Two have repair tools. One has a weapon. One has a healing tool.
- Found
- Take what you can get. Prioritize.
- My priorities are: Repair tool, weapon, healing/special item. Try to have variety. I prefer repair tool + weapon, but again, take what you can get. With multiple people, decide who needs it the most.
- Take what you can get. Prioritize.
Biomes
At the moment always using 3 speed and one shield is the most effective strategy no matter the player count or sub. This strategy is practically forced after the first cycle. Therefore the below strategies will be more traditional. The lights also may be optinal for some players which have very bright screens, yet it's still heavily recommended to turn them on when needed.
Atlantic Waters
- Strategy - A good combination of speed and other equipment, no lights needed.
- Crevette - 2 power into engines, 1 power into gun, 1 power into shield.
- Requin - 2 power into engines, and 1 power for each gun.
- Perle - 2 power into engines, 1 power into gun, 1 power into shield.
- Espadon - 3 power into engines, 1 power into guns.
- Poubelle - 2 power into engines, 1 power into gun, 1 power into shield.
- Dangers - This biome is fairly easy.
- Open Water - Swordfish are among the deadliest enemies, potentially killing players inside.
- Caves - No particular enemy stands out as dangerous, be aware of mini bosses.
- Boss - The Quadken - Avoid getting too close to it to avoid it's melee attacks. If you don't have homing torpedoes, outrun baby doupuses to keep the boss from spawning more. If you have homing torpedoes, they will lock on to the baby doupuses. Kill them quickly, then damage the boss before it spawns more.
Frozen Waters
- Strategy - Due to the icebergs that can block movement, it's generally advisable to always have 1 power to gun so that it's possible to quickly destroy them.
- Crevette - 2 power into engines, 1 power into gun, 1 power into shield.
- Requin - 2 power into engines, and 1 power for each gun.
- Perle - 2 power into engines, 1 power into gun, 1 power into shield.
- Espadon - 2 power into engines, 2 power into guns.
- Poubelle - 2 power into engines, 1 power into gun, 1 power into shield.
- Dangers - This biome poses a big threat on small crews or speedrunners, due to it encouraging slower playstyles.
- Open Water -The Icebergs Can block progress and force the crew to attack any enemies that were previously pursuing them. The cold water can also freeze doors and cause hypothermia, making repairing less effective.
- Caves - Crab eggs can pose a large threat if the crew has no ranged weapons.
- Boss - (Placeholder)
Cursed Waters
- Strategy - Always have at least 1 power allocated to shields to avoid being invaded by pirates. Avoid shooting with the cannon as it's recoil may cause the submarine to hit an effigy
- Crevette - 1 power into engines, 1 power into gun, 2 power into shield.
- Requin - 3 power into engines, and 1 power for one gun.
- Perle - 1 power into engines, 1 power into gun, 2 power into shield.
- Espadon - 2 power into engines, 2 power into guns.
- Poubelle - 1 power into engines, 1 power into gun, 2 power into shield.
- Dangers - This is the hardest initial biome and arguably one of the most dangerous of the game.
- Open Water - The effigies will spawn an Abomination if damaged or touched. Avoid them at all costs. Another big threat are pirate ships, as they will deal heavy damage and spawn multiple Cursed Pirates inside the submarine.
- Boss - (Placeholder)
Dark Depths
- Strategy - Allocate power to lights, pay constant attention to your surroundings and consider using the cannon
- Crevette - 2 power into engines, 1 power into gun, 1 power into lights.
- Requin - 2 or 1 power into engines, 1 or 2 power for guns, 1 power to lights.
- Perle - 1 power into engines, 1 power into gun, 1 power into shield, 1 power into lights.
- Espadon - 2 power into engines, 1 power into guns, 1 power into lights.
- Poubelle - 2 or 1 power into engines, 1 or 2 power into for guns, 1 power to lights.
- Dangers - This biome is the darkest one in the game, meaning it is particularly important to put power to lights. This biome is also capable of overwhelming you with enemies that are hard to kill.
- Open Water - This biome is full of slow, tanky enemies and fast, small enemies. It is generally a good idea to put more energy into engines, so you can outrun many enemies. It is also important to have good aim to fend off waves of small creatures.
- Caves - Always destroy snail spawners. Remember their shots can be avoided if you stand on top of them.
- Boss - (Placeholder) -
Infected Depths
- Strategy - Slow and careful progression, lights needed.
- Crevette - 1 power on everything
- Requin - 1 power to Light, 1 or 2 power to Engines, the rest of it to Weapon systems.
- Perle - 1 power on everything
- Espadon - 2 power to engines, 1 power to lights, 1 power to gun
- Poubelle - 1 power on everything
- Dangers - This biome in particular can be very hard to recover once the submarine begins to get flooded.
- Open Water - Remember to avoid Barnacle Mines. Pay attention to the outside of the submarine, as enemies such as the Barnacle Maw and the Barnacle Grabber Can easily cause havoc.
- Caves - Try to clear the caves quickly, as Barnacles will spawn from the walls. Never feel too secure, as Barnacle Spiders Can drop from the ceiling and surprise you.
- Boss - The Hive - The trick to this boss is to go to it's blind spot - Under it. When there, stick to it's root and attack it until it dies.
Volcanic Depths
- Strategy - Fast yet careful progression, ignoring enemies along the way.
- Crevette - 3 power on engines, 1 power to lights.
- Requin - 1 power to Light, 3 power to Engines.
- Perle - 2 power to engines, 1 power to lights, 1 power to shields.
- Espadon - 3 power to engines, 1 power to lights.
- Poubelle - 2 power to engines, 1 power to lights, 1 power to shields.
- Dangers - Slow progress can easily lead to death, due to the vents and the slow, yet tanky enemies found in this biome.
- Open Water - Since most enemies are difficult to kill do to them being invulnerable in many spots, it is unnecessary to use guns. Instead, ignore them and progress, paying close attention as to not accidentally hit any
Obstacles. Vent Boosting Is also a useful skill for experienced players.
- Caves - Volcanic boars are the greatest danger, as they can easily overrun players and are hard to dodge, making ranged weapons more suitable for fights in caves.
- Boss - (Placeholder)
Aurelian Waters
- Strategy - Slow and careful progression, focusing on killing faster enemies and ignoring slow enemies along the way.
- Crevette - 2 power on engines, 2 power to gun.
- Requin - 2 power to Engines, 1 power to each gun.
- Perle - 1 power to engines, 2 power to gun, 1 power to shields.
- Espadon - 2 power to engines, 2 power to gun.
- Poubelle - 2 power to engines, 1 power to gun, 1 power to shields.
- Dangers - Fast progress can easily lead to death, due to the few fast, nearly unavoidable enemies and slow enemies that can quickly damage or deactivate the submarine.
- Open Water - If a burrowing worm appears and there's no other dangers in view, focus on killing it, as it's impossible to outrun it. Carefully and slowly progress through the biome, as to not hit the dangerous EMP jellyfish. You can't drown in the Aurelian waters, but the water can mess with control panels and driving panels deactivating them for 1-2 seconds at a time, this can be dangerous if you dont reealise since you dont take damage from drowning, also you dont need a light so this may be preffered rather than the volcanic depths.
- Caves - Always stick together, a Manowars are common and if they attach to your head, you can't remove them without the help from your team and will inevitably die. Angel Fish should be killed or enemy bodies destroyed to prevent them from being resurrected.
- Boss - The Ephyra - The boss is invulnerable in most spots, excpet for the big red areas. Due to the high damage output and nearly unavoidable attacks from this boss, fighting it is a race to who can kill the other first. Reallocate energy to shields and guns. If the submarine is shieldless, it's advised to use torpedoes.
Prehistoric Waters
- Strategy - Always keep an active gunner, because all enemies in this biome are heavy damage dealers. Avoid staying still for too long, as it will allow multiple Prehistoric Flowers to spawn, which will make progress difficult.
- Crevette - 1 power on everything.
- Requin - 1 power to Light, 1 or 2 power to Engines, the rest of it to Weapon systems.
- Perle - 1 power on everything.
- Espadon - 2 power to engines, 1 power to lights, 1 power to gun.
- Poubelle - 1 power on everything.
- Dangers - Enemies have incredibly high DPS, and can easily overwhelm you.
- Open Water - Always be on the move and avoid leaving the guns. Do not let any enemies get near the submarine, as they can quickly kill you. Cannons should be considered due to their knockback on enemies. Remember to never leave open holes, as Plant Invaders can pose a big danger.
- Caves - Prehistoric Caves are notorious for their high amount of enemies. Don't rush and remember you can avoid damage from Trilobites by standing on top of them.
- Boss - (Placeholder)
Mechanical Waters
- Strategy - Slow and careful progression, lights needed. Always keep guns powered and manned.
- Crevette - 1 power into engines, 1 power to lights, 1 power into gun, 1 power into shield.
- Requin - 1 power into engines, 1 power to lights, and 1 power for each gun.
- Perle - 1 power into engines, 1 power to lights, 1 power into gun, 1 power into shield.
- Espadon - 1 power into engines, 1 power to lights, 2 power into guns.
- Poubelle - 1 power into engines, 1 power to lights, 1 power into gun, 1 power into shield.
- Dangers - This biome is highly dangerous and filled with traps.
- Open Water - Progress slowly and carefully, with constant use of the Tactical View to inform the driver of the location of traps and for him to follow the optimal route when possible. The gunner should always be active, as destroying traps can be essential for getting past some sections of the map.
- Caves - Trash Compactors can deal heavy damage very quickly, but are easy to kill when handled with care.
- Boss - The Ambassador - Park the submarine near the boss and assign the most well-armed crewmembers to a defensive position, to take care of The Emissaries. The gunner must not be interrupted, as he will have to continuously chip away at The Ambassador's health, and possibly shoot down Emissaries before they arrive. One last crewmember should constantly repair to avoid overflooding.
Caves
The Cave Generator at work
- Caves can be generated in multiple shapes and sizes - See Cave Generator gif on the right.
- Big caves have a low chance of appearing at first, but the odds of finding a big cave increases based on the current depth.
- Ladders can be used to attack enemies with ranged weapons safely, as many of them are unable to swim or climb ladders.
- Dodge rolling can be used to kite most enemies.
- Don't destroy corpses unless you have the Butcher Knife. They can be used to give an indication to where you have been.
- Always focus on spawner enemies, as they will continuously spawn enemies as they are killed unless the spawner is destroyed.
Civilizations
- Similarly to caves, some civilization dwellers are vulnerable if you use ladders. This may, however, change in some update.
- Hiding inside the submarine is not an option, as they are able to enter and even break doors to reach you! If you don't want to lose your doors, it may be a good idea to fight outside the vessel.
- Since all civilization dwellers deal heavy damage, ranged Weapons or skilled use of dodge rolls is important to do a successful raid.
Undersea Lairs
- Every Undersea Lair layout is designed with the boss in mind - find ways to reliably hit their weak spots, find locations where you're safer while attacking or where you can stop to heal your crewmates with healing Items.
- Specific Boss Strategies
- (As of now, the Lair Guardian is the only Undersea Lair boss) The Lair Guardian - Take note of the gadgets he has and adjust your strategies accordingly. While Short ranged weapons may be good for the Laser and Drone spawner, that does not hold true for dealing with his Sword. The Lair Guardian takes highly increased damage if hit in the head and can also be staggered if hit on an (unknown) spot. Ranged weapons are great for targetting it's weak spots and melee weapon users will have to climb the multiple chains hanging from the Lair's ceiling to deliver devastating blows to the Guardian's head. Additionally, sustained damage to it's limbs or head may cause them to fall off, which can leave the Lair Guardian mostly defenseless.
Advanced
- Vent Boosting - The act of using the knockback from Vents to boost ahead and avoid enemies.
- Espadon Blocking - The act of using the Espadon drill to block enemies from hitting the submarine. Generally used on bosses or when there's no power allocated to the engines.
- Banana Slipping - The act of using the Banana Peel to move extra Items to the interior of the submarine.